St. Patrick’s Day Treats – Irish Car Bomb Cupcakes

I promised green treats and here they are.  Okay, so they aren’t green but they are a dessert take on a traditional Irish-inspired drink.  I brought them to my DWB dance rehearsal last Thursday night and a few to work on Friday morning.  Not to brag, but everyone loved them. (Yes, I know that is bragging. Forgive me.)

I couldn’t actually eat the cupcake portion (Lent…) but you can bet I had a serving or two of the buttercream by itself.  I just couldn’t resist.  I don’t think you could either.

For those of you who have never had one, an Irish Car Bomb is a drink consisting of Guinness, Jamieson and Bailey’s.  You take a 16 ounce glass and fill it a little more than halfway with Guinness.  You then take a shot glass half full of Jamieson and half full of Bailey’s, drop it into the glass of Guinness and chug the whole thing before it curdles together.

Apparently, it’s supposed to taste like chocolate milk.  They don’t – I had my first one on Saturday night.  I’m a much bigger fan of this dessert.  These cupcakes (without the Jamieson part – I decided against the whiskey ganache this time) are a piece of Irish heaven.  And there is no chugging involved.

— I’m sorry that there are no pictures yet.  Unfortunately, I have a horrible reputation with cameras and I either need ANOTHER new one or I have to charge the one I have now.  Sad.  I’ll get them up ASAP!

Irish Car Bomb Cupcakes
Adapted from Baked Perfection

Guinness Cupcakes
1 cup Guinness Stout
1 cup butter (I use Brummel & Brown)
3/4 cup unsweetened cocoa powder
2 cups all-purpose flour
1 cup sugar
1 cup splenda (or another calorie-free sugar substitute)
1.5 tsp. baking soda
3/4 tsp. salt
2 eggs
2/3 cup low-fat sour cream

Bailey’s Buttercream
3/4 cup butter (Brummel & Brown)
Powdered sugar (I never measure it; I don’t like it super sweet so I just add it in small amounts until I reach the sweetness I like.. it’s probably around 2 to 2.5 cups)
Capful of Bailey’s (literally use the Bailey’s bottle cap – probably about a tablespoon)

Optional garnish:
Green sugar sprinkles

For the cupcakes:

Preheat oven to 350 degrees.  Line cupcake tins with liners.  I made 24 mini cupcakes and 17 standard size from one batch of batter but you can make 24 standard cupcakes or 48 minis with the same amount. 

Bring Guinness and butter to a simmer over medium-high heat.  Whisk in the cocoa powder until fully combined and smooth.  Take it off the heat and allow it to cool.

Whisk together the flour, baking soda and salt in a bowl together.  In another large bowl, beat sour cream and eggs together until just combined.  Slowly, add the Guinness mixture to egg.  Gradually add the flour and continue to beat until it is all incorporated.

Evenly distribute the batter into the prepared cups filling them about 3/4 full.  Bake until tester comes out of the center clean – approximately 14 minutes for mini cupcakes, 17-19 minutes for the standard size.  Let cool completely before frosting.

For the buttercream:

Cream butter until smooth in a large bowl using a hand mixer.  Gradually add the powdered sugar until desired sweetness and consistency are reached.  Finally, add the Bailey’s and fully combine.

To decorate:

Using a pastry bag (or awesome mechanical piping set), pipe frosting onto each cupcake.  Garnish with green sugar sprinkles. 
Store in airtight tupperware at room temperature.

Bun&Borough Guest Post!

I know I promised St. Patrick’s Day treats and they are coming, I swear!  At the moment, I am experiencing problems with my camera and I want to get the gorgeous photos on with the post.

In the meantime, I have guest posted again!  This time, it is for my good friend, Christine.  She has a beautiful blog about good style and good living as she chases her dreams in NYC.  Her blog, Bun & Borough, covers everything from food to gratitude to running.  She is truly an inspiration and as she says in my intro, we’ve been friends for 14 years – back to the days when my mom picked out my clothes and I had a not-so-cool hairstyle.  She stuck with me through it all.

My guest post features an entire 3-course meal.  Let me know what you think! Bun&Borough Guest Post!

Everybody’s Irish on St. Patrick’s Day!

Happy St. Patrick’s Day everyone!  Although I’m not Irish, I usually take part in the traditions anyway.  I mean, how can you not get into the spirit when you’re a college student and there’s green beer to be had?

Well, I’m not an undergrad anymore and to be honest, I don’t like green beer at all.  But there are things about St. Patrick’s Day that I do love.  The color green is one of them, boiled cabbage is another.  But it seems that St. Patrick’s Day isn’t just an excuse for a free-for-all drinking binge (which, I will not be taking part in but if you head to South Boston, you definitely won’t be alone) but its the perfect time to try out some great Irish-inspired recipes.  I have selected a few of my favorites from some fellow cooking blogs.  I hope you enjoy them!

Oh – and yes, I made St. Paddy’s Day treats for my dance rehearsal tonight.  Check back for my next post to see how pretty they turned out!

Hungry Girl’s Shamrock & Roll Shake

Corned Beef & Cabbage

Double Fudge Irish Cream Cookies

Traditional Irish Car Bomb 

Plaid St. Patrick’s Day Cupcakes (Video Tutorial)

And speaking of cupcakes…. Well, you’ll just have to wait and see!

My Cousin’s Favorite (Healthy) Dessert

I have a very close family.  It almost borderlines on too close.  Everyone knows everyone else’s business and everyone has an opinion about one thing or another.  That’s why I love it so much.  We are a big, loud family: slightly quirky and very charming.

On my dad’s side(the Italians), there is a perfect progression of granddaughters.  I am the oldest at 22, my cousin Sam is 21, my sister Melissa is 20, cousin Ali is 19 and my cousin Gabrielle will be 17.  We have a lot in common, especially a love of good food.

What’s sad is that we’ve never all lived in the same place at the same time.  My 3 cousins grew up traveling and living all over the world while my sister and I lived in the same house in Massachusetts our whole lives.  Summers were the months we looked forward to because the girls would come to visit.

Years later, I am back in the same house I grew up in after finishing my Bachelor’s Degree, my sister is south of Boston working on hers, Sam & Ali are in opposite ends of Virginia getting their BAs and Gabs is in high school in England.  This is when the saying “Absence makes the heart grow fonder” really means something.

Nevertheless, each one of us has a passion and love for food.  Over the summers, I have tested my recipes on them (and them on me!) but one has consistently been Sam’s favorite.  It’s easy, healthy and she wants it desperately.  I considered not telling her, but hey, family is family… and she could probably beat me up.

(Healthy) Creamy Vanilla Fruit Dip
Recipe from Hungry Girl

3/4 cup Cool Whip Free
3 TB fat-free cream cheese, softened
3 TB Splenda granulated
1/2 TB sugar-free, fat-free jell-o instant pudding mix, vanilla

Mix all ingredients together until smooth.  Chill 30 minutes.   Serve with apple slices, strawberries, graham crackers or eat it straight with a spoon. 

Make a lot if the family is coming over.

Red Velvet Cheesecake Swirl Brownies

Red is rapidly becoming my new favorite color.  I don’t know what’s wrong with me exactly.  Maybe it’s because Valentine’s Day was last week.  Maybe I can’t resist the decadent aroma of red lusciousness baking in the oven.  Or maybe it’s the simple fact that I almost always have the standard ingredients on hand.

Coincidence?  I think not.

My thought process went as such: I had an extra 8-ounce package of low-fat cream cheese in my fridge and nothing to do the other day after work (besides spend some quality time on my abs at the gym) until 9 o’clock.   That left me a substantial amount of time to make something special for the blog and the boyfriend.

In my search for cream cheese recipes, I clicked through fellow food blogs for ideas.  Cakes with cream cheese glazes, nah.  Banana bread with a cream cheese filling?  Intriguing, but no.  Red velvet swirl brownies? Ding, ding, ding.. We have a winner!

I modified the recipe – big shock, right? I’ve never been a big fan of “real” butter to begin with so, as usual, I used my Brummel and Brown margarine spread.  It’s made from natural yogurt (hey, don’t knock it till you try it.) and has significantly better nutritional stats than butter.  I also used a sugar-Splenda mix to cut back on the amount of real sugar in the recipe.  Oh, and of course, I substituted low-fat cream cheese for regular. 

The results: Well, there aren’t any left if that’s what your asking.  I took the entire batch, minus 4, to my boyfriend’s house that night and they were gone within a day.  And for good reason…

Red Velvet Cheesecake Swirl Brownies
Adapted from Baked Perfection

Brownies:
1/2 cup Brummel & Brown, melted
1/2 cup sugar
1/2 cup Splenda
1 teaspoon vanilla extract
1/4 cup unsweetened cocoa powder
Pinch salt
3/4 tablespoon red food coloring
1/2 teaspoon apple cider vinegar
2 eggs
3/4 cup all-purpose flour

Cream Cheese Layer:
8 ounces reduced-fat cream cheese, softened
1/4 cup sugar
1 egg
1/2 teaspoon vanilla extract

Preheat oven to 350 degrees.  Lightly spray an 8 by 8-inch baking pan with non-stick cooking spray, and set aside.

To make the brownies:  Pour melted “butter” to a large bowl and add the sugar, Splenda, vanilla, cocoa powder, salt, food coloring, and vinegar (in that order), mixing between additions.

Whisk the eggs in a small bowl and stir it into the cocoa mixture. Fold in the flour with a spatula until lightly combined. Pour the batter into the prepared baking pan, saving 1/4 cup of the batter for the top.

Cream cheese topping:  Beat the cream cheese, sugar, egg, and vanilla in a medium bowl with an electric hand mixer.  Gently spread the cream cheese layer on top of the brownie batter in the pan.  Dollop the remaining brownie batter over the cream cheese layer. Using tip of a knife, drag the tip through the cream cheese mixture to create a swirl pattern. (PS – don’t you love my brand new gold William Sonoma brownie pan?  Christmas gift from my auntie!)

Bake the brownies for 30 minutes. Remove to a cooling rack and try not to cut or touch them until they cool completely (the hardest part of baking in my opinion…)

A Very Special Valentine’s Day

Valentine’s Day .. a day of love, happiness and…. chocolate.  Oh yeah, massive quantities of chocolate.  Of just sugar in general.  Simple deliciousness.

This year, I joined a dance company for college graduates called DanceWorks Boston.  You might be asking why this is relevant to my Valentine’s Day but I have a point, I promise.  After one of my best friends and fellow dancer got a job offer in Connecticut that she could not refuse, the director of the company was down a choreographer.  Long story short, I now have my own contemporary piece and 20 talented dancers who spent Valentine’s night from 7-8pm with me sweating in a dance studio.   Dying to make some delicious love-themed sweets, I decided to make small treat packages for each of the girls.  Hence, the inspiration for this post (and some amazing desserts.)

I searched for days trying to figure out what to make.  I just couldn’t decide… brownies, cupcakes, cookies, mini parfaits… the list of possibilities were endless.  I went back and forth, debating between red velvet and dark chocolate, maybe a big chocolate chip cookie we could all share?  I almost gave up completely.

Then, it hit me – dur, Marie, just make more than one thing and share the wealth.  Tie with some pretty ribbon, attach a (cough, Disney Princess, cough) Valentine.  Oreo Truffles, Red Velvet Cakeballs, White Chocolate-Peanut-Pretzel Bark … Perfection.

The recipes… well, I must give credit where credit is due.  I found the Oreo Truffles and the Red Velvet Cakeballs courtesy of the lovely Bakerella herself.  I may have tweaked the recipe to fit my needs, but hey… dancers don’t usually eat full-fat cream cheese.  The bark recipe came straight from Ms. Paula Deen herself and despite the fact that I NEVER make her recipes, (do I even need to explain why?), I found that this combination was the perfect amount of sweet and salty together.

First, I made the Oreo Truffles.  Pretty straight forward.  I whipped out my 14-cup food processor and pulverized a whole package (minus 7 oreos) to nothing but fine crumbs (cream filling and all).  I transferred it to a bowl and mixed it (more like mashed with the back of a large spoon) until it turned into a big ball of soft, oreo goodness.  I rolled 1-inch nuggets, let them harden in the freezer and dipped them in melted light cocoa candy melts (that I made a special trip to Joanne Fabrics for.)

Once the chocolate hardened around the oreo mixture, it was like biting into a little piece of heaven.  Out of all three things I made, I may be a little biased towards these.

Next up: White Chocolate-Peanut-Pretzel Bark.  3 steps: I melted some white chocolate chips and stirred in broken skinny pretzel pieces and lightly salted peanuts and voila! I spread it on a baking sheet lined with wax paper and stuck in the fridge for 20 minutes.  The chocolate mixture hardened and I was able to break it up like a brittle.  If you have a salty-sweet tooth like me, this is the easiest and most perfect snack with the exception of maybe dipping pretzels directly into melted chocolate.

Finally, I attempted the cakeballs.  Funny enough to say, these balls are both simple, yet time consuming.  Even though the foundation is a red velvet cake mix and cream cheese frosting, I ran into difficulty when I was supposed to roll them into 1-inch balls.  The batter was simply too sticky.  Instead, I took a cookie scoop and divided the batter onto cookie sheets.  I then stuck the balls in the freezer to firm up.

Consequently, I ran into a second problem.  When attempting to roll the cake balls in melted white chocolate, the balls were so gooey they were falling apart.  I rectified the situation by spooning the melted white chocolate on top of each cakeball.  They may not have looked as pretty as Bakerella’s, but they definitely tasted great. (The ones in the picture aren’t frosted but simply covered with a thin coating of sugar.)

When it came time to pack them up, I slid a truffle, a cakeball and a few broken pieces of bark into a cellophane baggie, tied it with a red ribbon and attached the Valentines.  The girls in my rehearsal loved the treats.  I think I may try more blog-worthy recipes out on them more often!

Aren’t my dance friends pretty?

Oh – but how could I forget my amazing boyfriend?  This was our fourth Valentine’s Day together (!!!)  He is the most incredible guy I could have ever asked for.  And not to get all mushy on you, but it’s the real deal….

My gift to him: a L.L. Bean (his favorite store) rugby shirt, love dice (joke present) and a 6-pack of Reese’s Peanut Butter Eggs.  I wrapped them with a big red bow and a very funny card.  He loved it and the shirt fits him perfectly!

His present to me?  Something I have been wanting for practically a year; something he has taunted me with for about that long (let’s just say my Christmas present was wrapped in one of these bags but no bracelet was to be found in it…)

An “oxydized silver” Pandora … I screamed when I saw it.  He done good.

Oreo Truffles
Recipe courtesy of Bakerella

1 package Oreos
1 8oz package cream cheese, softened (I used low-fat)
White or Cocoa Candy Melts (can be found at specialty craft stores/bake shops)

Pulverize all but 7 oreos in a food processor (cream part included.)  Pour crumbs in large mixing bowl.

Add softened cream cheese and combine thoroughly.  (I used the back of a big wooden spoon until it was mostly combined, then dove in with my hands.)

Roll into individual balls at desired size.  Place on cookie sheet lined with parchment paper and freeze until hardened.

Melt candy melts in the microwave according to package directions.  (Only melt a little at a time; the melted chocolate will thicken the longer it’s out.)  Drop oreo balls one at a time into chocolate and cover completely using a spoon.  Lift covered truffle out of chocolate, tap off excess against the side of the bowl and let dry completely on parchment-lined cookie sheet.  Keep refrigerated or in a cool, dry place.

Risotto & Red Velvet

This past Sunday was the football playoffs between the Packers & the Bears and the Steelers vs. the Jets.  I love football, despite the fact that my team, the Patriots, made a poor showing against the Jets last week.  I’m still getting over it.  Nevertheless, I decided that in honor of these games (and the Steelers KILLING the Jets) I would make 2 new things.  The first, risotto; the second, Hungry Girl Red Velvet Cupcakes with my own buttercream frosting.

I found the risotto recipe from Food Network courtesy of Giada but I, of course tweaked it alittle bit.  Instead of regular butter, I used my favorite substitute Brummel & Brown which is a type of margarine made with all-natural yogurt.  I swear, it tastes just like the real thing and has a mere 50 calories and 5 grams of fat per serving.  A whole lot less than regular butter.

It took longer than I expected.  I browned a shallot in the butter, coated and toasted the rice, simmered in some wine and then slowly added the 2.5 cups of stock/water the recipe called for.  I think I ended up using an extra 2 cups of hot water because after the 2.5 original cups were gone, the risotto had thickened but the grains were still uncooked.  No problems though; just add more water and keep stirring like its your job and eventually, creamy risotto will be your result.

Stage one: Simmer in white wine (I used chardonnay, but feel free to use whatever white wine you have on hand.) This will take between 5-6 minutes.

Stage 2: Continue to add broth/water to rice (about 1/2 cup at a time), stirring constantly until each addition has completely evaporated.  It should continue to thicken and the rice will puff and become tender but still firm.  Depending on how much rice you are cooking will determine the time it takes for the liquid to completely evaporate.  Taste testing is always the best way to tell.  When I ran out of my original chicken stock/water mixture, I simply added water 1/2 cup at a time and continuted to stir until the rice was done.  I found it to be quite soothing.

Stage 3: Remove from heat and stir in a couple tablespoons of mascarpone cheese, a little extra butter (1 pad should be plenty) and some parmesan cheese. Pile into a bowl and eat!

It really was fabulous.  My family ate all of it in one sitting – even my mother who insisted that she DOES NOT LIKE risotto.  Well, I showed her what’s what.  She had 2 helpings and has already asked me to make it again.

Lemon Risotto

2 cups low-sodium chicken broth
2 tablespoons butter, plus 1 tablespoon
1 large shallot, diced
1 cup Arborio rice
1/2 cup dry white wine
2 tablespoons grated Parmesan, plus 2 tablespoons
2 tablespoons mascarpone cheese
1/2 a lemon, zested amd juiced
3/4 teaspoon kosher salt
3/4 teaspoon freshly ground black pepper

In a medium saucepan bring the broth and 1/2 cup water to a simmer. Cover the broth and keep hot over low heat.

In a medium, heavy saucepan, melt tablespoons of the butter over medium heat. Add the shallot and saute until tender but not brown, about 3 minutes.

Add the rice and stir to coat with the butter. Add the wine and simmer until the wine has almost completely evaporated, about 3 minutes.

Add 1/2 cup of the simmering broth and stir until almost completely absorbed, about 2 minutes. Continue cooking the rice, adding the broth 1/2 cup at a time, stirring constantly and allowing each addition of the broth to absorb before adding the next, until the rice is tender but still firm to the bite and the mixture is creamy, about 20 minutes.

Remove from the heat. Stir in the remaining tablespoon of butter, 2 tablespoons of Parmesan, mascarpone cheese, the lemon zest and juice, and the salt and pepper.

For dessert – red velvet cupcakes and buttercream frosting.  My cousin Ali gave me this amazing mechanical piping set for Christmas.  You pick whichever tip you want to use (there are 10!) and spin on the part that holds the tip to the barrel.  You then fill the barrel with frosting, put the cap on and push the cap for the icing to come out. It’s from William Sonoma and I LOVE it. 

I made Hungry Girl cupcakes because I figured I’d go with a lighter cake for a rich frosting.  Using reduced-sugar cake mixes, fat free hot cocoa, a few mini chocolate chips and some egg beaters, you’d be surprised how moist, fluffy and decadent these cupcakes are, even though they are better for you.

Enter: The Buttercream.  However, I again used Brummel and Brown to significantly reduce the fat and calories from the frosting.  Of course, I used real powdered sugar and a touch of vanilla extract but I always go a little easy on the sugar – I hate when frosting, especially buttercream, is too sweet.  My method is to cream the butter (leave it out beforehand to soften), then gradually add powdered sugar until it tastes right to you.  Right before you add what you think will be the last of your powdered sugar, add a teaspoon of vanilla and blend it in.  You can’t go wrong with that.

Once the cupcakes were cooled, I was free to try out my piping technique.  If I do say so myself, not too shabby – but I’ll keep working on it!

Hungry Girl Red Velvet Insanity Cupcakes
from www.hungry-girl.com

1 cup reduced-sugar chocolate cake mix
1 cup reduced-sugar vanilla cake mix
2 fat-free hot cocoa mix packets
1/2 cup fat-free egg substitute (I like Egg Beaters)
1/4 cup mini semi-sweet chocolate chips
Red food coloring
1 tsp Splenda (or your favorite no-calorie sweetener)
1/8 tsp salt

Place 2 TB of chocolate chips and contents from both hot cocoa packets in a tall glass.  Add 12 ounces of boiling water and stir until chips and cocoa have dissolved completely.  Place glass in freezer until cold (about 30 minutes.) 

Meanwhile, preheat oven to 350 degrees.  Once the cocoa mixture has chilled, give it a stir and pour into a large bowl.  Add cake mixes, Splenda, salt, egg substitute, remaining chocolate chips and red food coloring (until desired color is reached.)  Whisk until smooth and blended.  (Batter will be thin – this is okay.  The cupcakes will puff up while baking.) 

Line a 12-cup muffin tin with cupcake liners and spray with non-stick cooking spray.  Evenly distribute batter amoung cups and bake 15-20 minutes, or until a toothpick comes out clean.  The cupcakes will look shiny.  Let cool before frosting.

It’s snowing, I’m cold.. time for chili.

So I’ve been a horrible blogger.  No new posts since December.  Not that I haven’t been busy working 2 jobs, applying to grad school and trying to keep myself from drowning in debt… I have.  Nevertheless, I’ve been neglecting it.  But not anymore!  Oh, and good news… while I don’t have a fancy-shmancy camera that most other bloggers have, I can upload my not-so-creatively-taken iPhone pictures to my blog now! So, if you feel so inclined, flip back through some of my old posts because hopefully now, I will have some pictures to edit in!

I cooked a lot for Christmas.  I made everything from spinach appetizers to family raviolis to cupcakes and an ice cream cake for my cousins birthday..seriously.  Look at it:

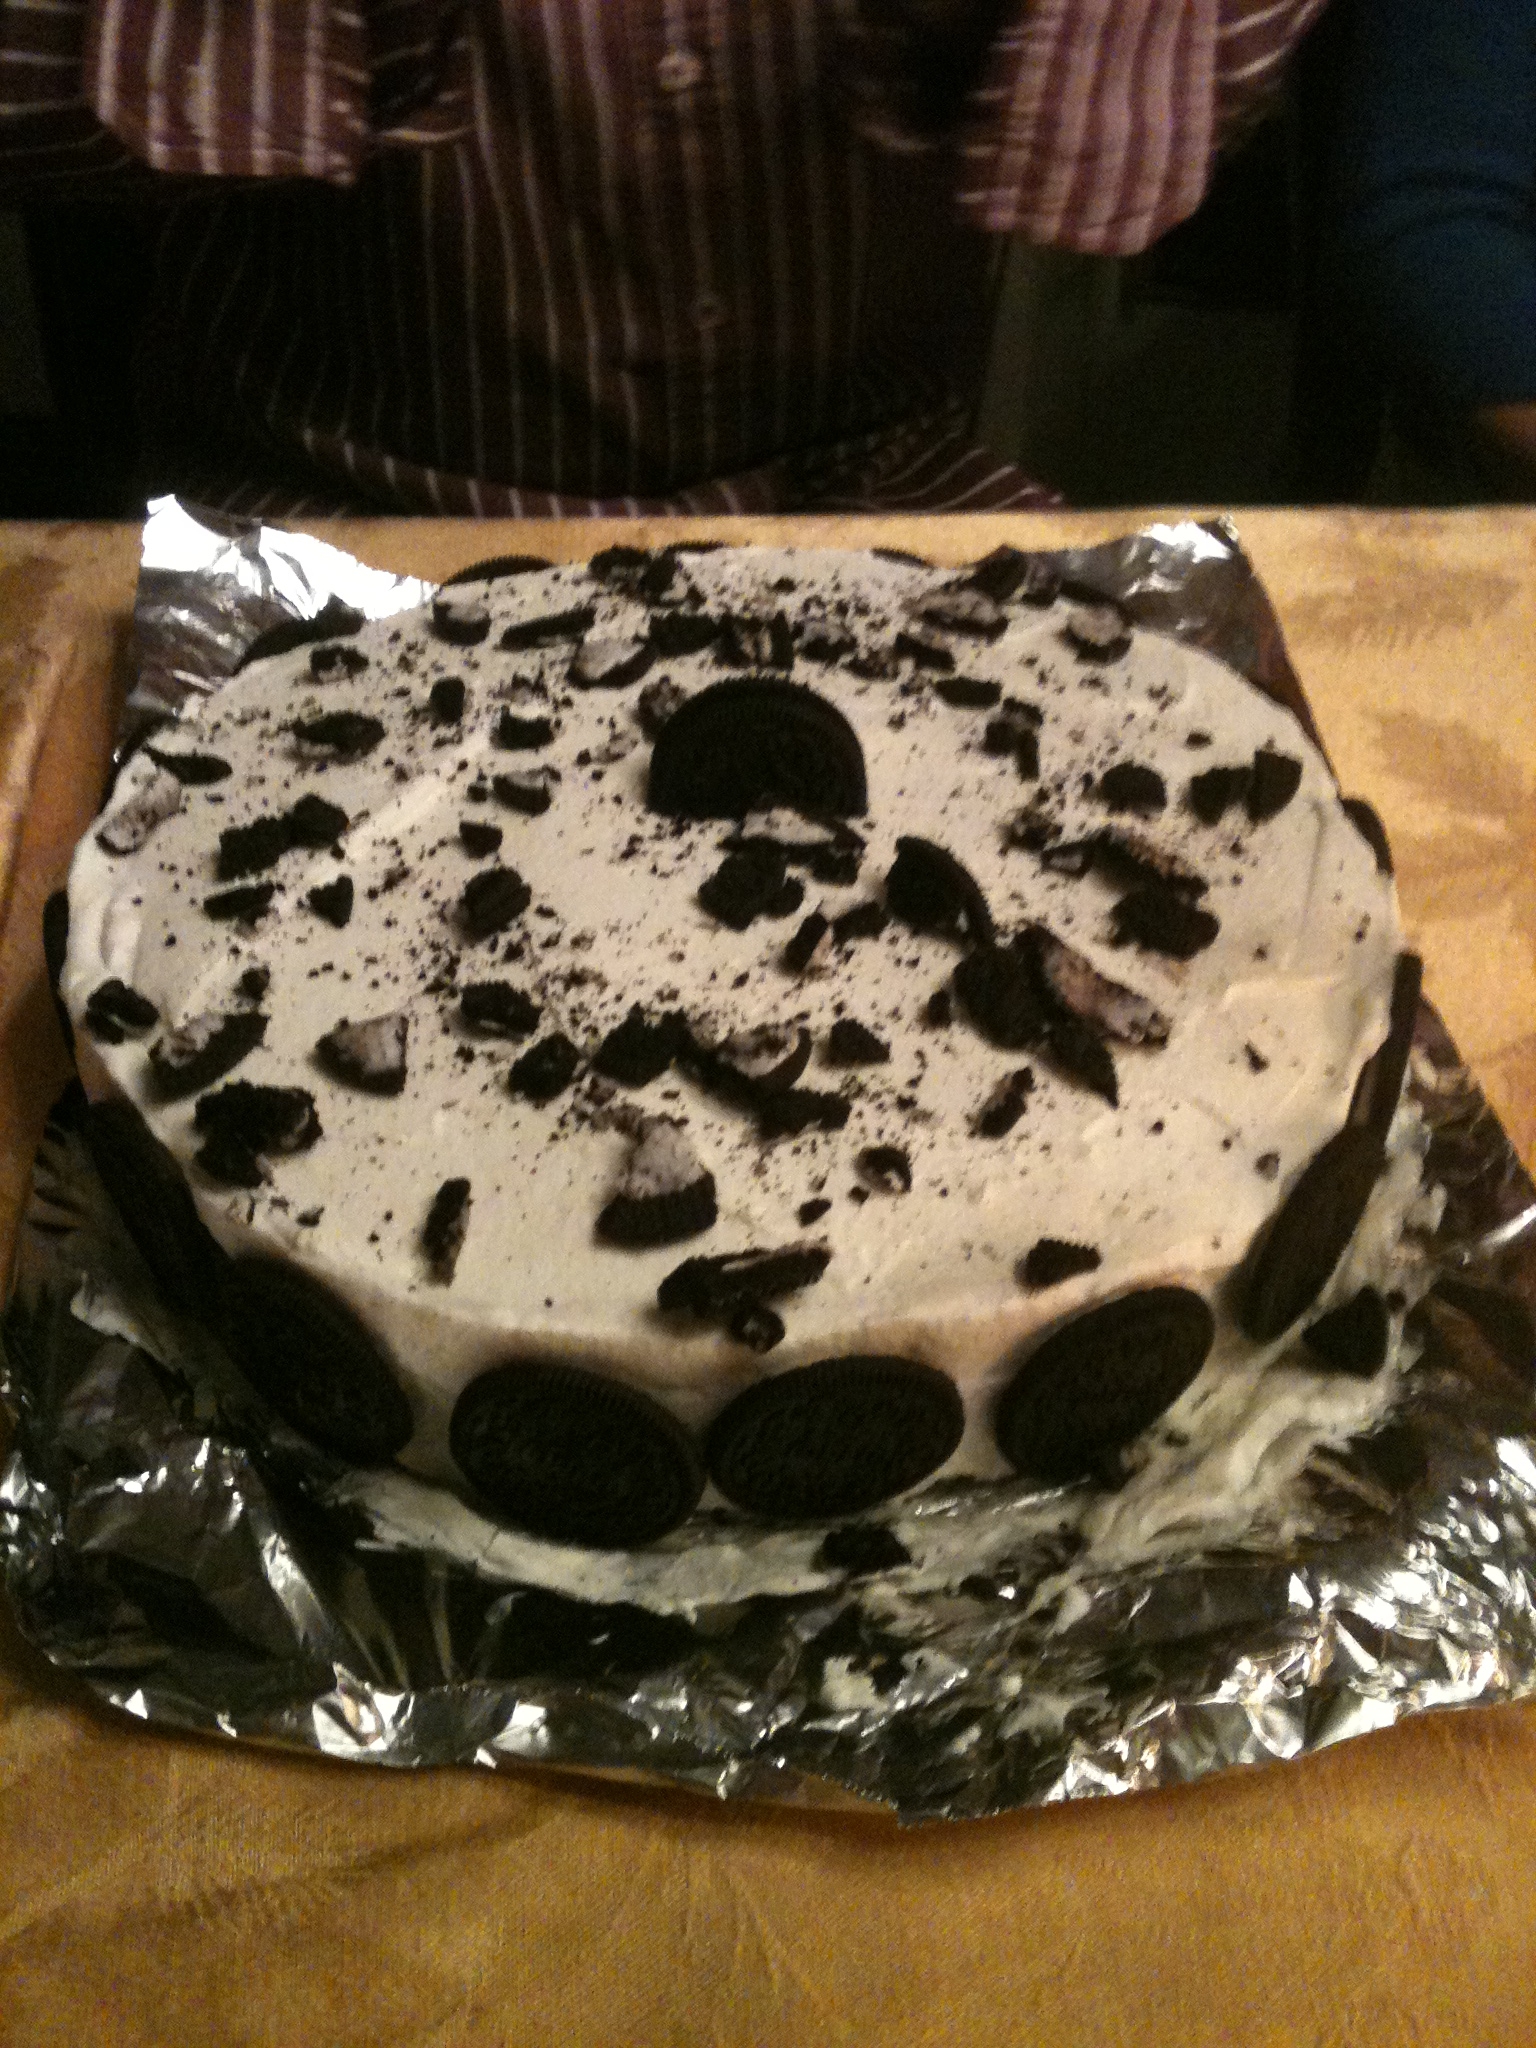
 Not bad right? Yay for pictures!

And then, for about a week or so after New Years, I will a little cooked out, I won’t lie.  But I’m back in the swing of it and, proud to say, that I’ve been on a healthy eating kick for a while now (New Year’s Resolution…duh).  And whoever says healthy food is boring is WRONG.

It’s snowing here in Boston – again.  Third time in three weeks.  It’s actually getting a little ridiculous.  THERE’S NO WHERE TO PUT IT ALL!!!  And, if you didn’t know this about me before I’ll tell you now… I HATE SNOW.  This is why:

Yep, that’s my car….Nevertheless, cold weather and snow call for a few things.  First, hot cocoa with frothy milk (which I can now make thanks to my new milk foamer!)  Second, a warm, cozy fire and a fleece blanket.  Third, comfort food.  Normally, I’d be all about the mashed potatoes but since I’m being good, I’ll go for the amazing veggie chili I mentioned in a previous post.  And once I have perfected my recipe, I will post it… with a picture.  Gotta love iPhones.

Cookies & Cream Ice Cream Cake

Ingredients:
2 quarts Cookies & Cream ice cream (or your favorite)
Homemade or tub whipped cream
Oreos

Leave ice cream out on counter until soft but not melted.  Spread 1 container at a time evenly into a 9″ spring form cake pan.  Place in the freezer to firm completely (best if done for several hours or overnight.)

Remove cake from freezer to thaw slightly before serving.  Cover in a layer of whip cream (a relatively thin layer) and garnish with oreo cookies. 

To serve: Run a sharp knife under hot water between each slice.

Cupcake truffles… well, almost.

Today was the annual Radiology Christmas luncheon at my work. Naturally, there was way too much food and I definitely didn’t need that last brownie, but oh well.

This year, I was going to make the same red velvet cupcakes that I made for my boyfriend’s family’s Christmas party but let’s be honest, those were WAY too time consuming for the beautiful creations to sit uneaten on a plate in the Radiology lounge.

So, I searched high and wide for a recipe I could make quickly but would still be delicious. I follow a food blog named Cheeky Kitchen and her Cupcake Truffles had me at HELLO.  Unfortunately, these are slightly easier said than done. (PS – this picture came from her blog!)

First off, I didn’t use mint chips because Stop n Shop doesn’t sell em.  Plus, I prefer peanut butter chips.  I mean, hel-lo.  So I used her same measurements with the white chocolate chips she recommended and the peanut butter chips. 

Besides burning my hand on the extremely hot plastic ziplock bag while piping the chocolate into the mini cupcake cups, my only complaint about these was the end result.  While tasty, they stuck to the paper.  I didn’t even think of spraying the cups because I figured that the chocolate would harden away from the wrapper in the fridge overnight.  Wrong.  I also was unable to pipe the frosting-like look that Brooke accomplished in her photo.  The melted white chocolate and peanut butter was thin and slightly runny and I had barely enough to cover the tops of the cooled truffles.  I was happy when the topping hardened almost instantly like it is supposed to though.

Overall, everyone at work liked them even if they had have to scrape the bottom part off the wrapper with their teeth.  I think it was more like fudge.  I’ll probably try it again.  Thanks to Brooke, I do have a very easily duplicated, chocolate-ty recipe that I can whip out any time of year, not just at Christmas.

One night, three hits…

The other night I decided to make 3 completely new recipes, ones I had found in some internet searching but never tried.  It was a three-course dinner the other night with recipes from three different places – an appetizer from a fellow blogger, the entree if a mere 4 points from Weight Watchers (and worth each delicious point) and the dessert, from Miss Giada di Laurentis herself. 

I must say though, of the three, I was the most disappointed in Giada’s recipe.  I wish I had taken pictures, but I forgot, of course.  More details about this in a bit.

I decided to make “Spinach Brownies” as the appetizer for a few reasons.  One, they are from a blogger whose website I visit frequently.  Jamie, the lovely young lady who writes My Baking Addiction is, to me, a culinary genius.  (Not to mention one of the most creative cupcake makers I’ve come across.)  I know the name seems a little off-putting but don’t be fooled – these things are incredible.  I decided to make them because even though my original appetizer recipe for spinach balls was a hit with my family, this recipe is much less time consuming (and definitely more delicious).  I made a few changes – her original recipe calls for bell peppers and bacon, but I think they were just as yummy.

Spinach Brownies (adapted from My Baking Addiction)
Ingredients
(10 ounce) frozen package spinach
1/2 cup all-purpose flour
1/2 teaspoon salt
1/2 teaspoon baking powder
1 egg
1/2 cup milk
1/4 cup butter, melted
1/2 onion; chopped
1 clove garlic
1/2 cup shredded mozzarella cheese (more like a cup if you’re like me)

Directions
1. Preheat oven to 375 degrees F (190 degrees C). Lightly grease a 8×8 inch baking dish.
2. Place spinach in a medium saucepan with enough water to cover. Bring to a boil. Lower heat to simmer and cook until spinach cooked, about 5 minutes. Remove from heat, drain thoroughly and set aside.
3. Sautee onions and garlic in a pan over medium heat until vegetables are slightly softened.
4. In a large bowl, mix flour, salt and baking powder. Stir in egg, milk and butter. Mix in spinach, onion mixture and mozzarella cheese.
5. Transfer the mixture to the prepared baking dish. Bake in the preheated oven 30 to 35 minutes, or until a toothpick inserted in the center comes out clean. Cool before serving.

Next up, the entree.  While browsing my account on Weight Watchers, I was looking up healthy dinner recipes featuring ground turkey for the sole reason that I had some in my freezer and I’ve been dying to experiment with it.  Plus, I had to find some way to “hide” it well enough in flavor that my dad (who prefers fatty ground beef, obviously) would love it.  When I found this recipe, a mere 4 points a serving, I knew it was the one. 

It features some of my favorite things – the turkey, spaghetti squash (note to self, use more often!), and two types of cheese!  I was a little weary at first but as my dad took a bite and complimented me on it, I was elated.  Call it a new staple in my kitchen.  (By the way, we did tell him it was ground turkey.  Didn’t stop him from eating 2 helpings!)

Weight Watchers Italian Turkey & Spaghetti Squash Pie

  1 medium raw spaghetti squash   
  1/2 pound(s) uncooked ground turkey breast (or 1 whole pound if you’ve got it)
  2 tsp olive oil (I just use cooking spray to saute veggies)
  1 small onion, chopped   
  1 clove (medium) garlic cloveminced   
  28 oz canned diced tomatoes, undrained   
  1 tsp italian seasoning, or more to taste   
  6 oz fat-free ricotta cheese (I used low fat)
  1 large egg
  1 spray cooking spray, nonstick (more if you are using it to saute)
  1/2 cup(s) shredded fat-free mozzarella cheese (yeah right – definitely

Instructions

  • Preheat oven to 350ºF. Halve squash lengthwise; scoop out seeds. Place squash, cut sides down, in a large baking dish and prick skin all over with a fork. Bake until tender, about 30 to 40 minutes.
  • Meanwhile, cook turkey, stirring occasionally, in a nonstick skillet over medium-high heat until browned, about 5 minutes. Drain, remove from skillet and set aside.
  • In a same skillet, heat oil over medium-high heat. Add onion and garlic; saute until onion is tender, about 5 minutes. Stir in tomatoes and Italian seasoning; bring to a boil. Reduce heat; add cooked turkey and simmer, stirring often, until desired consistency, about 5 minutes.
  • Place ricotta and egg in a food processor or blender; puree until smooth (or forget the gadgets and blend it with a whisk by hand)
  • Coat a 9-inch glass pie plate with cooking spray. Remove squash from oven and increase oven temperature to 375ºF.  LET COOL OR YOU WILL BURN YOURSELF.
  • Using a fork, carefully rake stringy squash pulp from shell, separating it into strands that look like spaghetti. Arrange spaghetti squash strands in bottom and up sides of pie plate to form a crust.
  • Add ricotta cheese mixture and gently spread over squash. Pour tomato-turkey sauce over cheese mixture and sprinkle with mozzarella. Bake for 20 minutes. Remove from oven and let stand 5 minutes before slicing into 6 pieces. Yields 1 piece per serving.

And of course, my favorite part of any meal – dessert.  More specifically, Giada’s Lemon-Ricotta cookies.  Originally, I made these for a colleague at work because she requested them a while ago.  I made a half batch because really, who needs 45 cookies? 

Well, these things are awesome in theory – and the batter was pretty tasty too.  I mean, who can go wrong when you put 1/2 a container of ricotta in cookie batter?  Unfortunately, these were more like lemon-ricotta pancakes when they came out of the oven.  Even though I added the correct amount of each ingredient, I’m sad to say that the execution was a little elusive to what I was trying to achieve.  Nonetheless, I’ll save the recipe and try them again for experiment’s sake.  For Giada’s recipe, check out one of my favorite websites (that of course, doesn’t load while I am at work): www.foodnetwork.com

Overall, my three course experiment was very successful.  Next up?  Christmas – let the Season of Joy & Sweet Treats begin!